Create a subaccount
An empty account is always created during the sub-account creation process. Users who are members of the account above must first be invited in order to view the sub-account data.
To create a new sub-account, navigate to the accounts overview page by clicking on "Accounts" in the left side navigation.
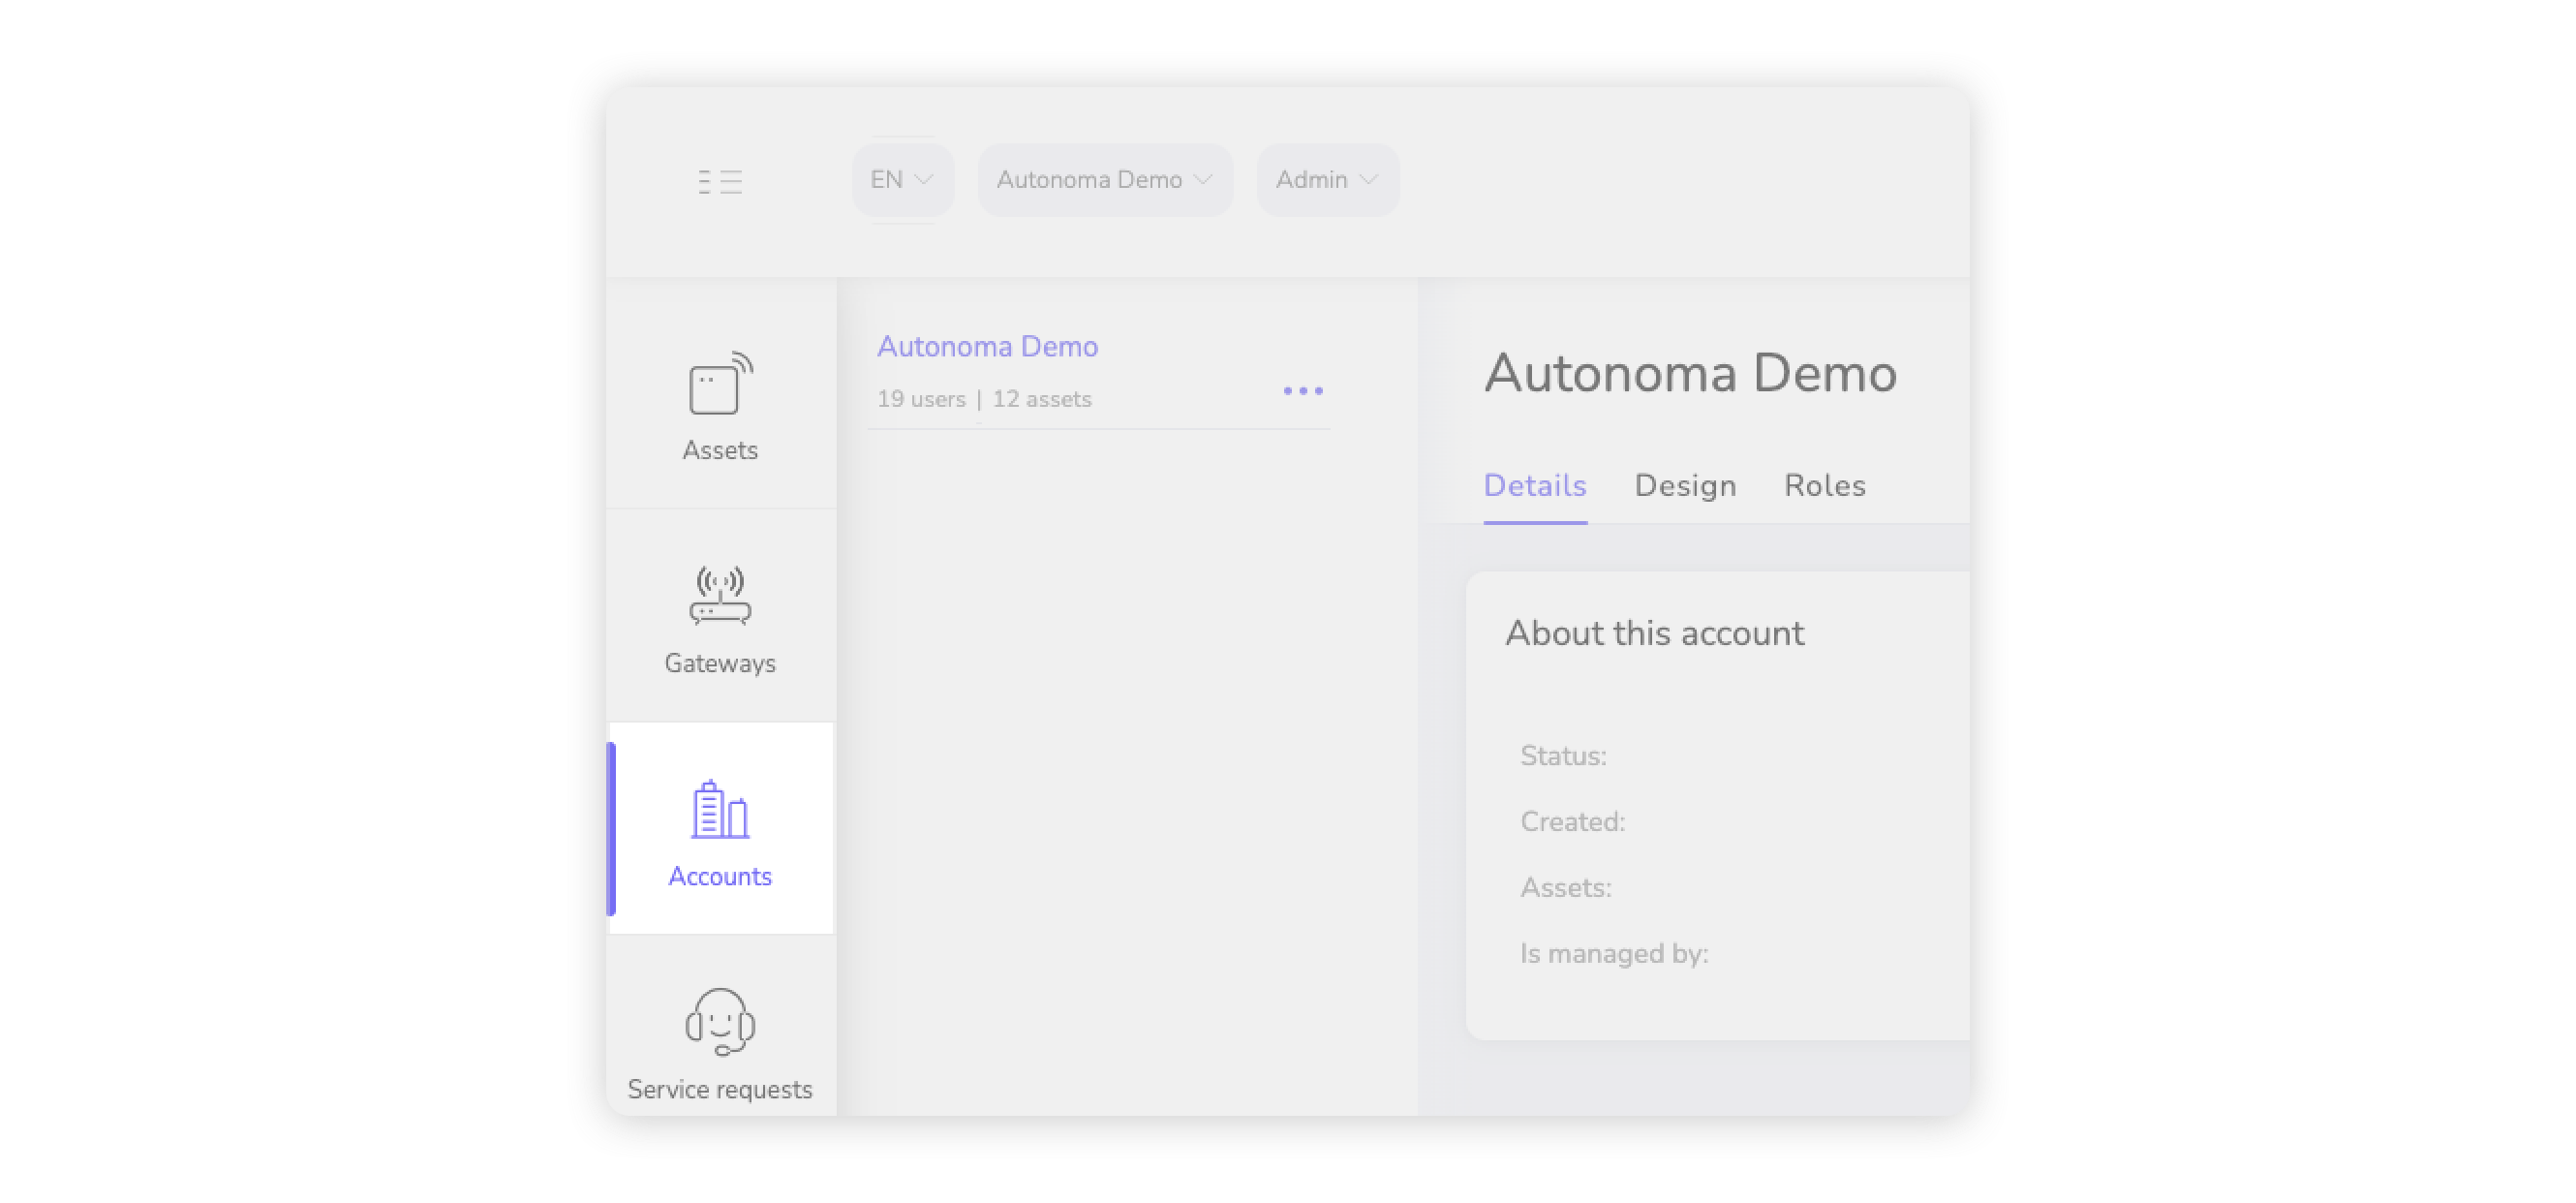
The page navigation with selected accounts overview page.
Select an Image
In the left-hand section of the account details, you will find a visual representation of the account structure. In the example below, the (currently active) "Autonoma Demo" account has a sub-account "Customer 1".
It is also possible, for example, to create another sub-account for the Autonoma sub-account ("Customer 1"). To do this, click on the 3 dots to the right of the account name.
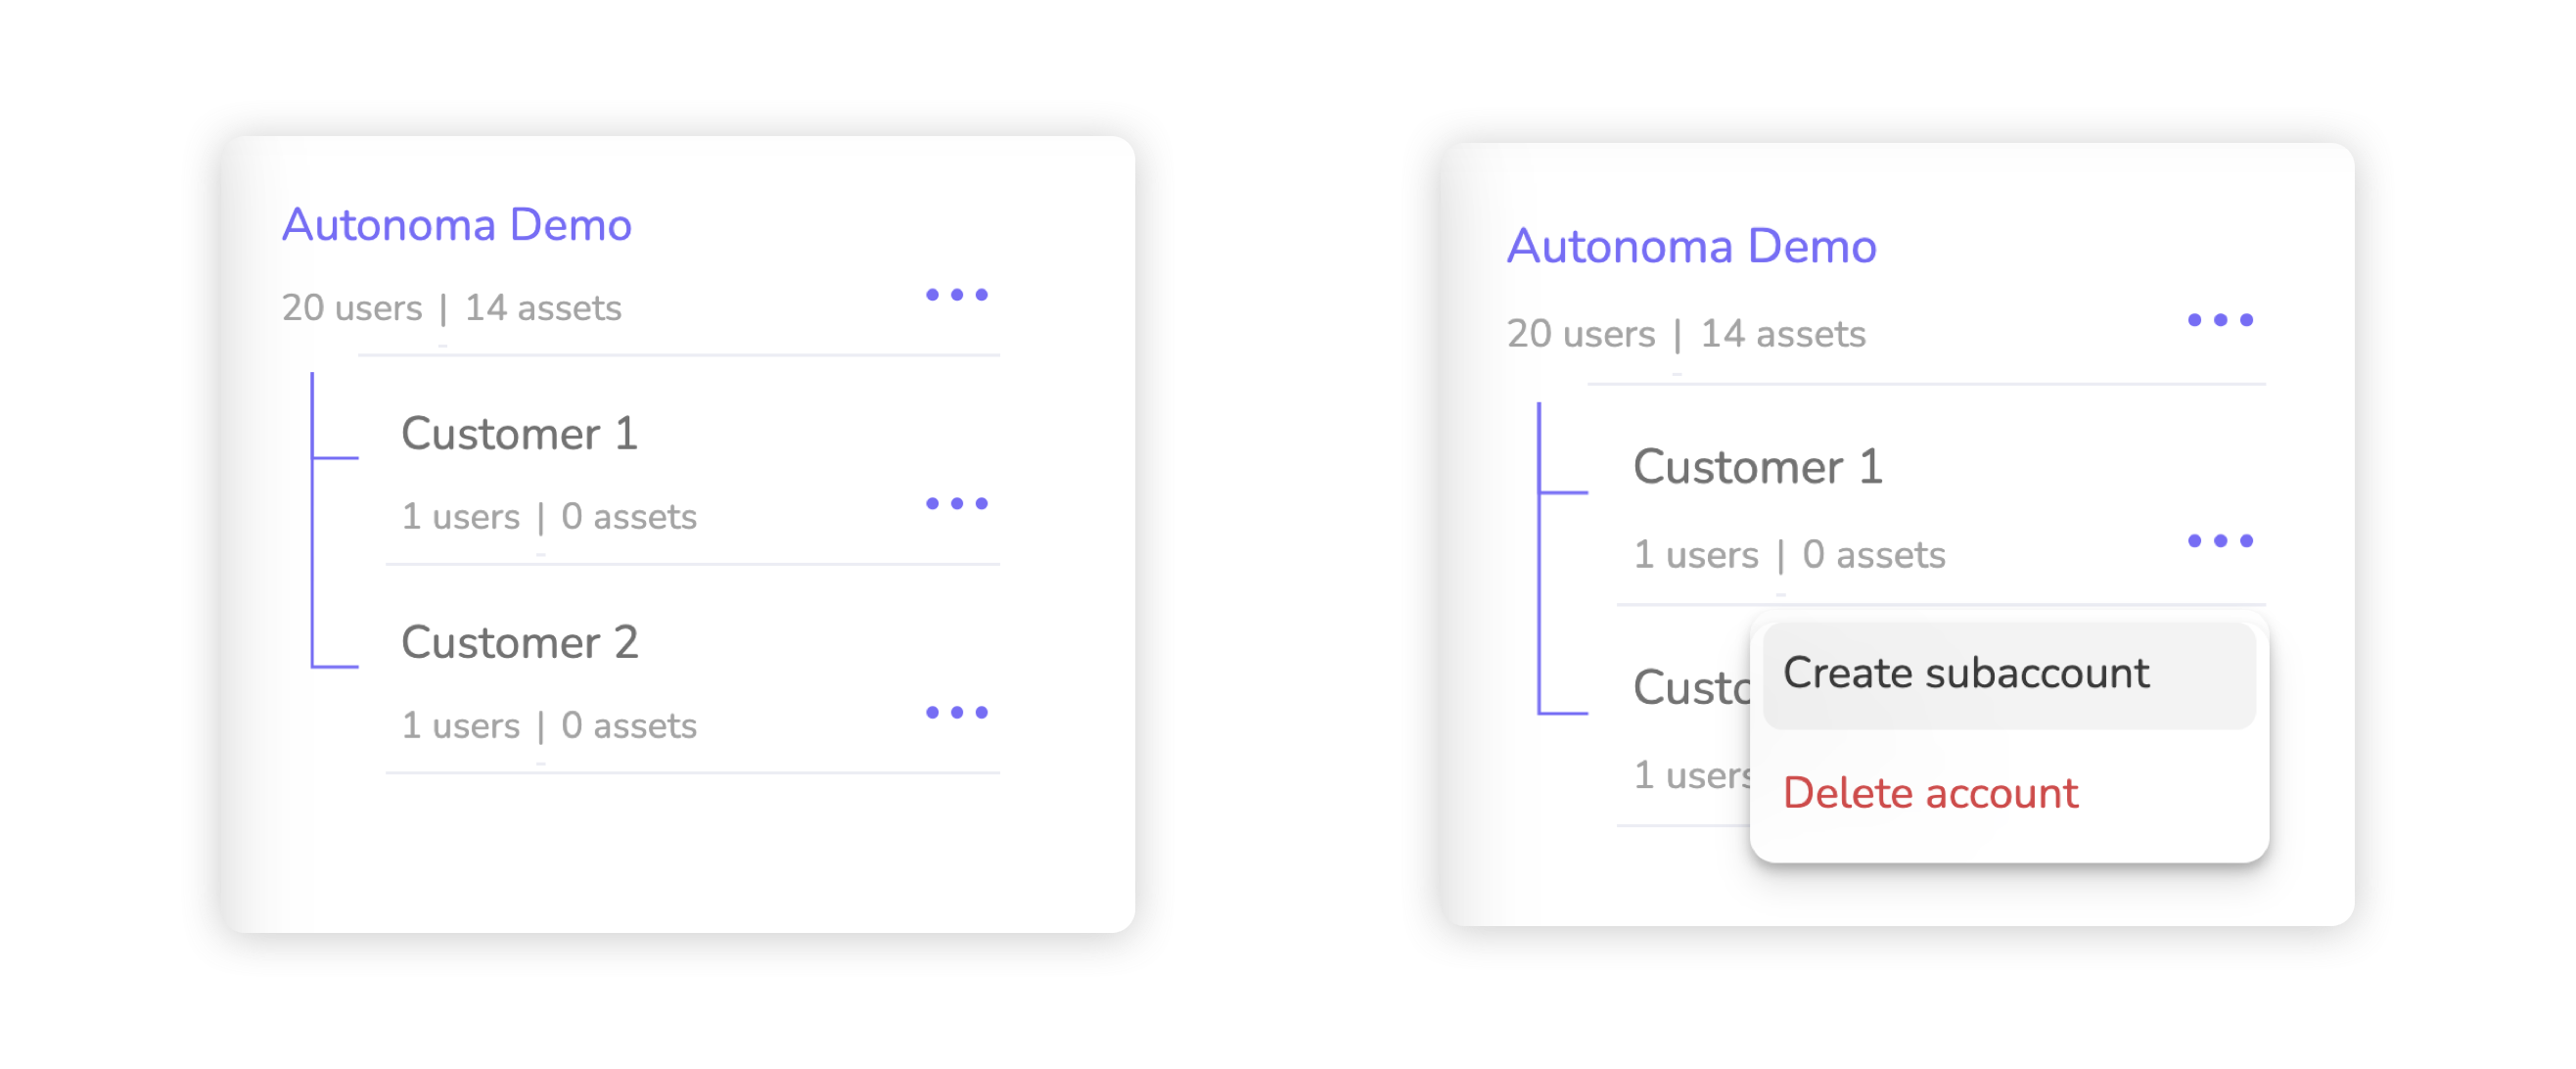
Display of all accounts visible to the current user and their sub-accounts. Functions for creating a new account or deleting the existing one.
Select an Image
Then click on "Create sub-account" in the menu that opens.
The dialog appears, which guides you through the creation of a new account. In the first step, enter the name of the account and an optional description. Then click on "Next".
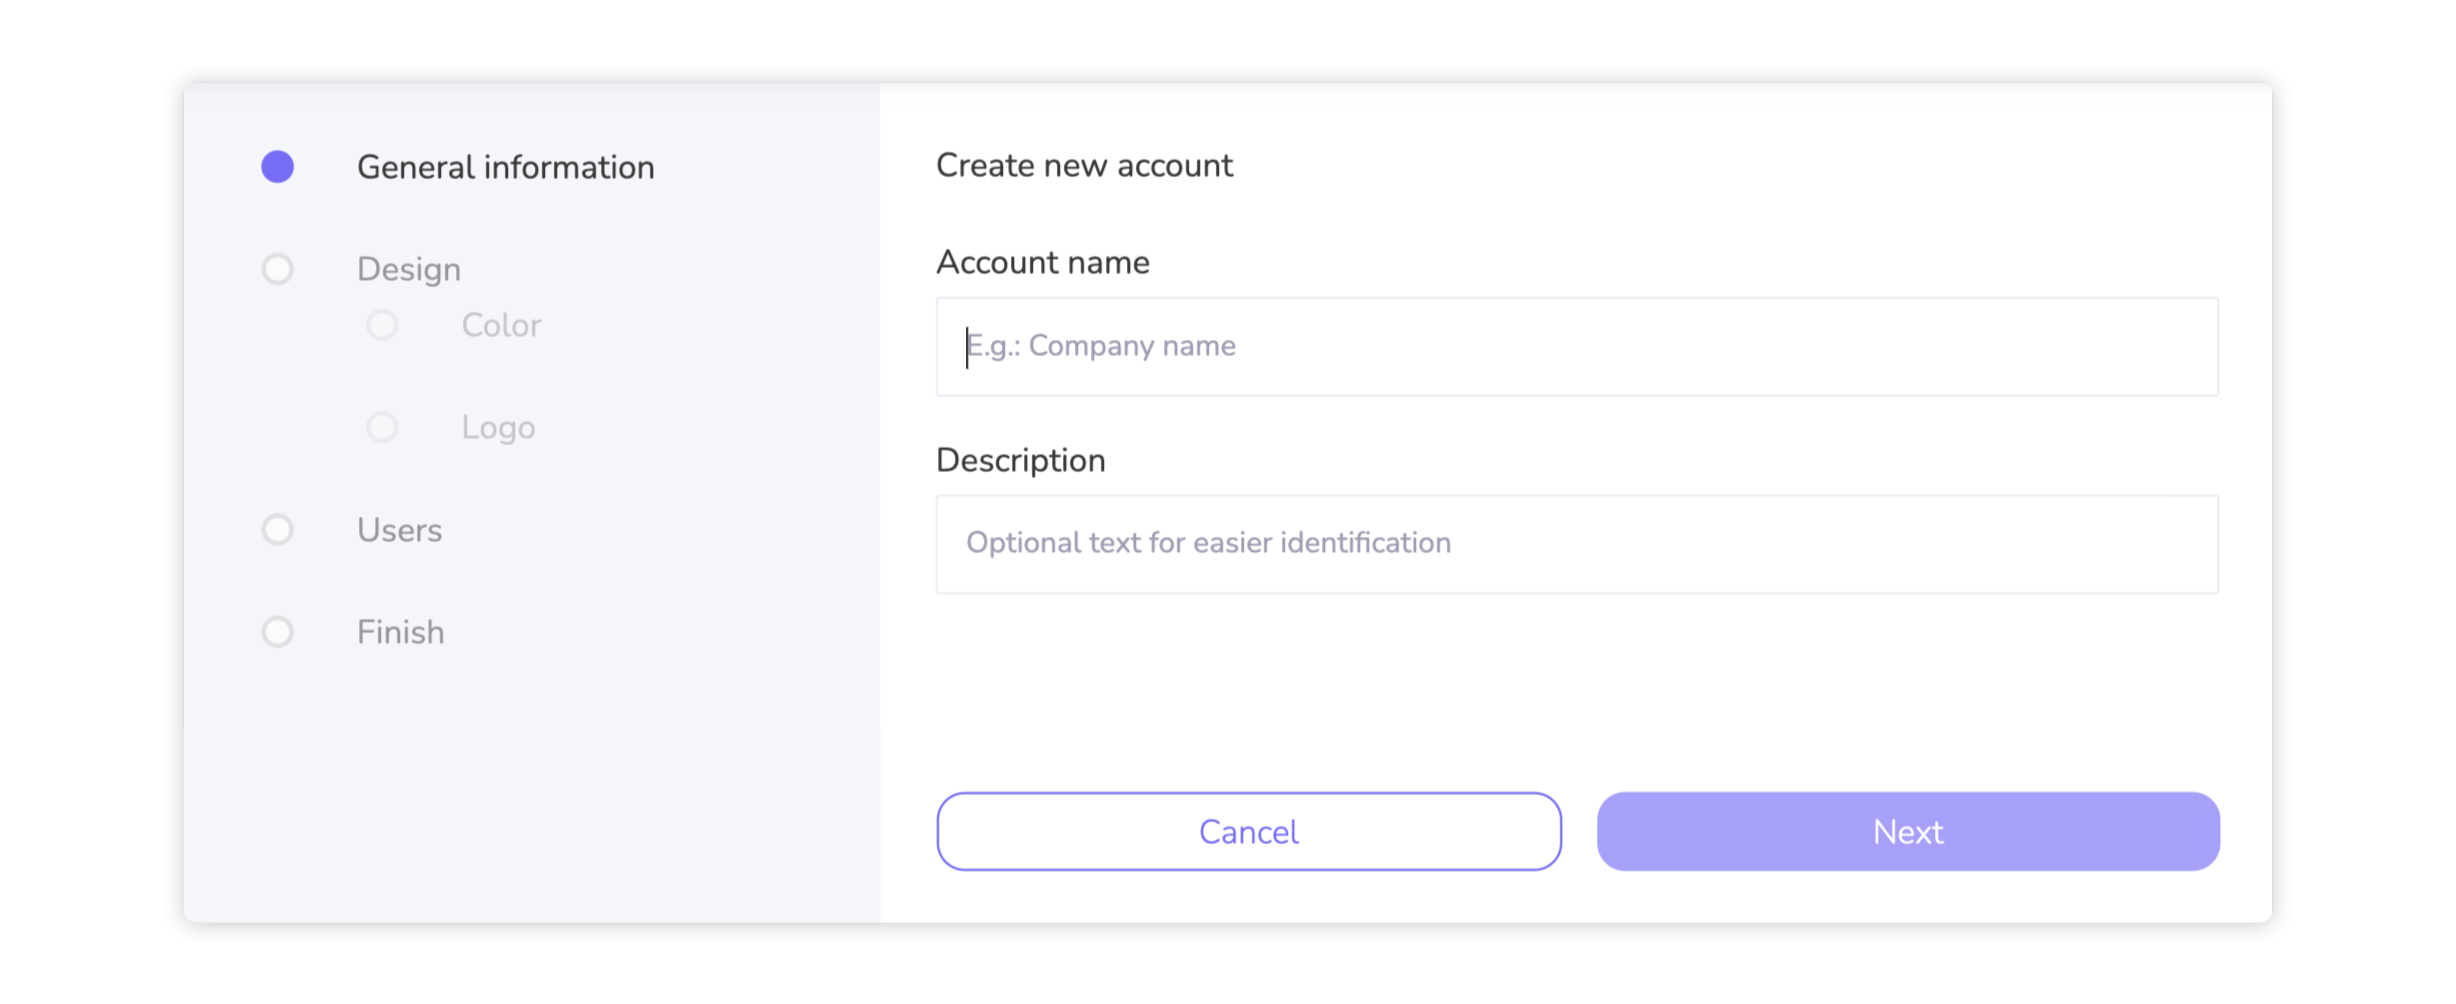
Starting point of the account creation process.
Select an Image
The next step is to define a design for the account. This influences the visual appearance of the platform, such as the logo and the colors of the operating elements.
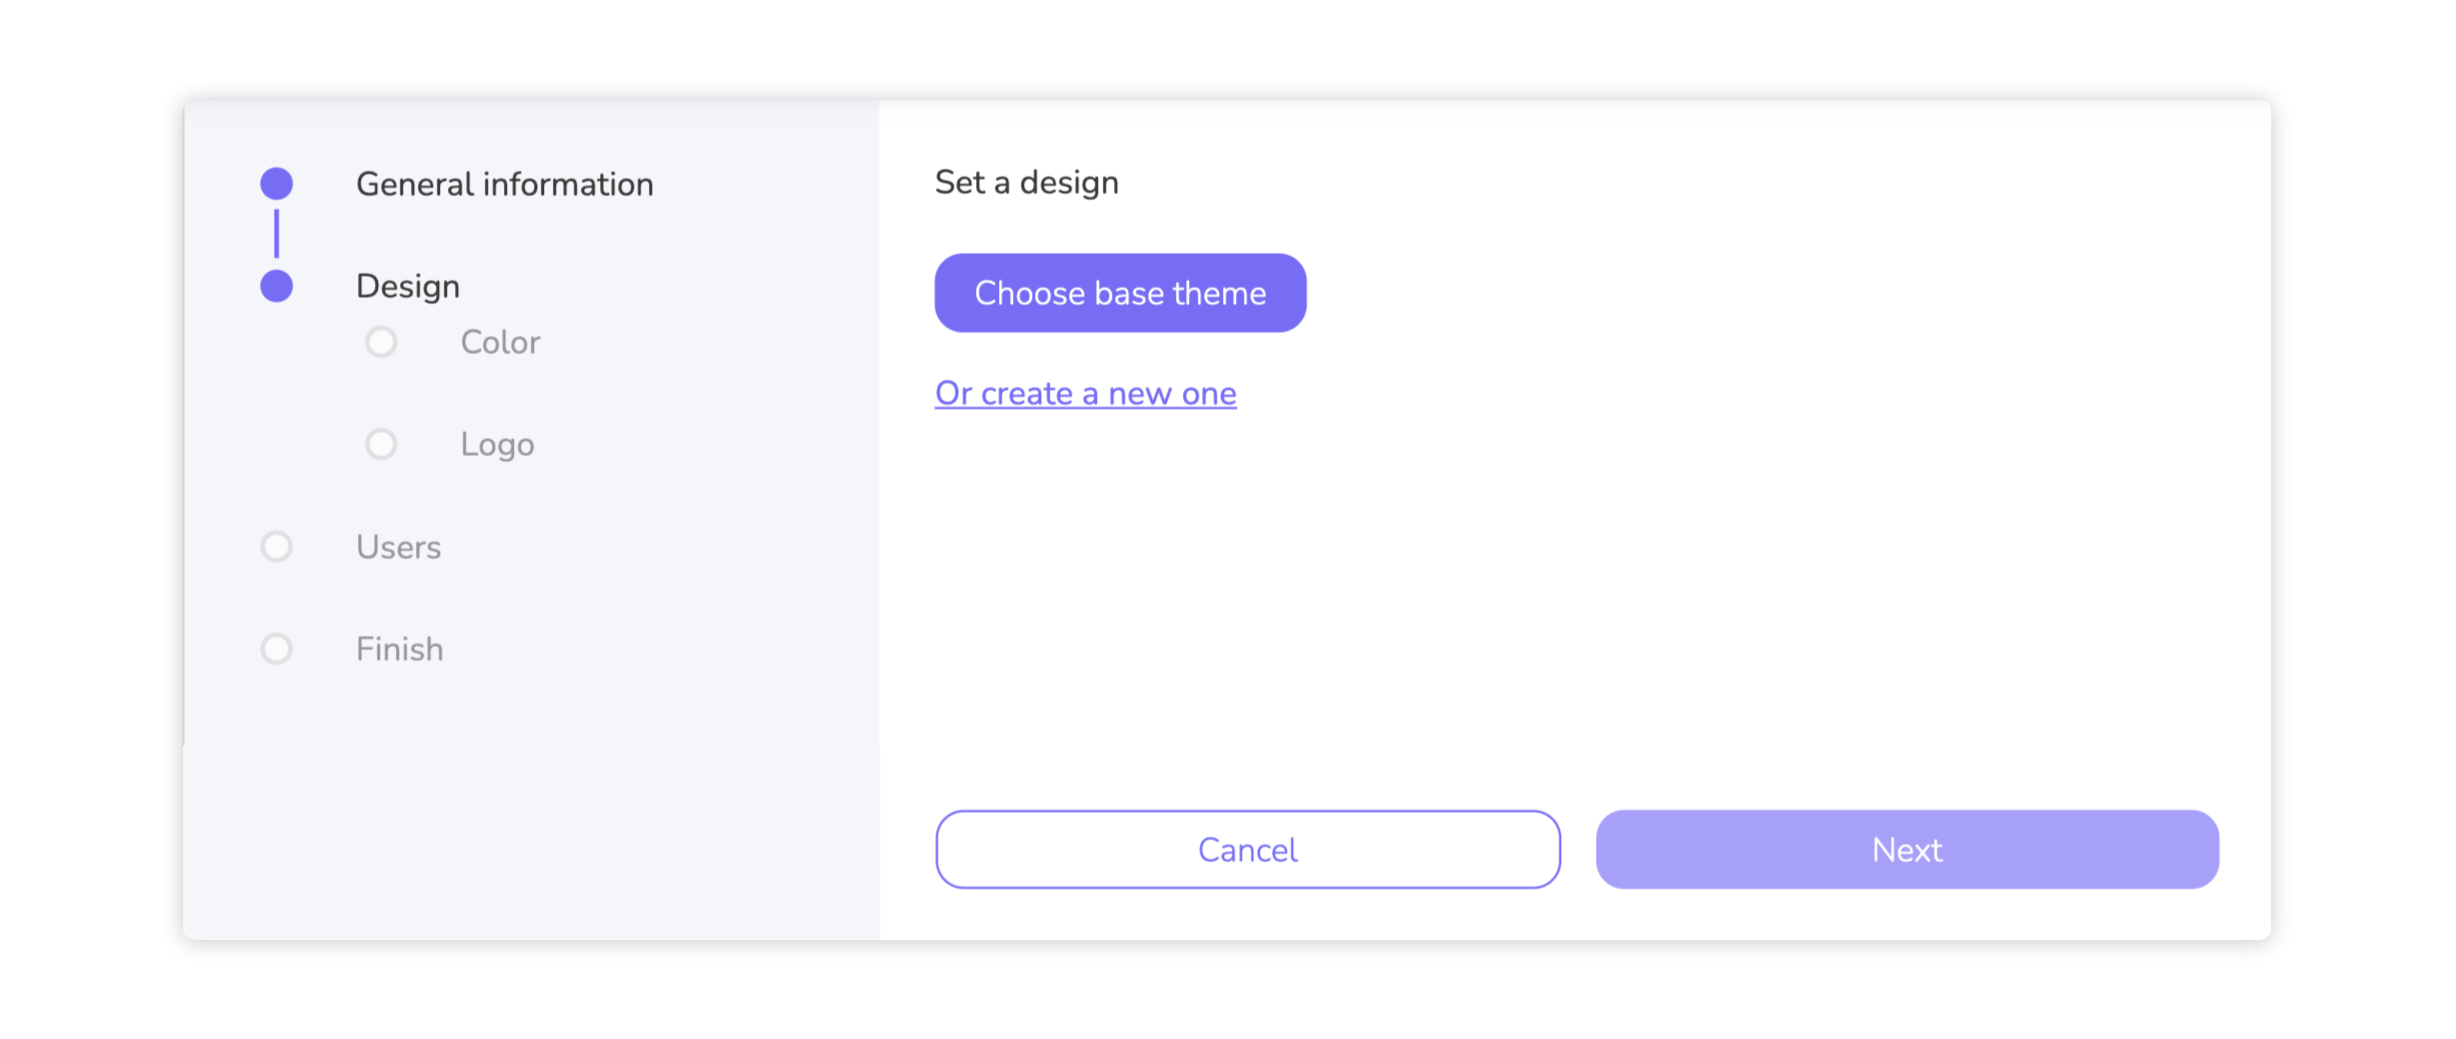
Select an existing design or create a new one.
Select an Image
You can either select an existing design ("Choose basic theme") or create a new one ("Or create a new one"). The following sub-items describe the options in each case.
Choose basic theme
This function allows you to reuse a design that has already been created. To do this, click on the "Choose basic them" button. A new dialog opens. This consists of the selection list above and the design preview below. All designs that have already been created for the parent account are displayed in the selection list. Depending on the selection, the design preview adjusts to make it easier to find the right design. Once you have selected your desired design from the selection list, click on "Save".
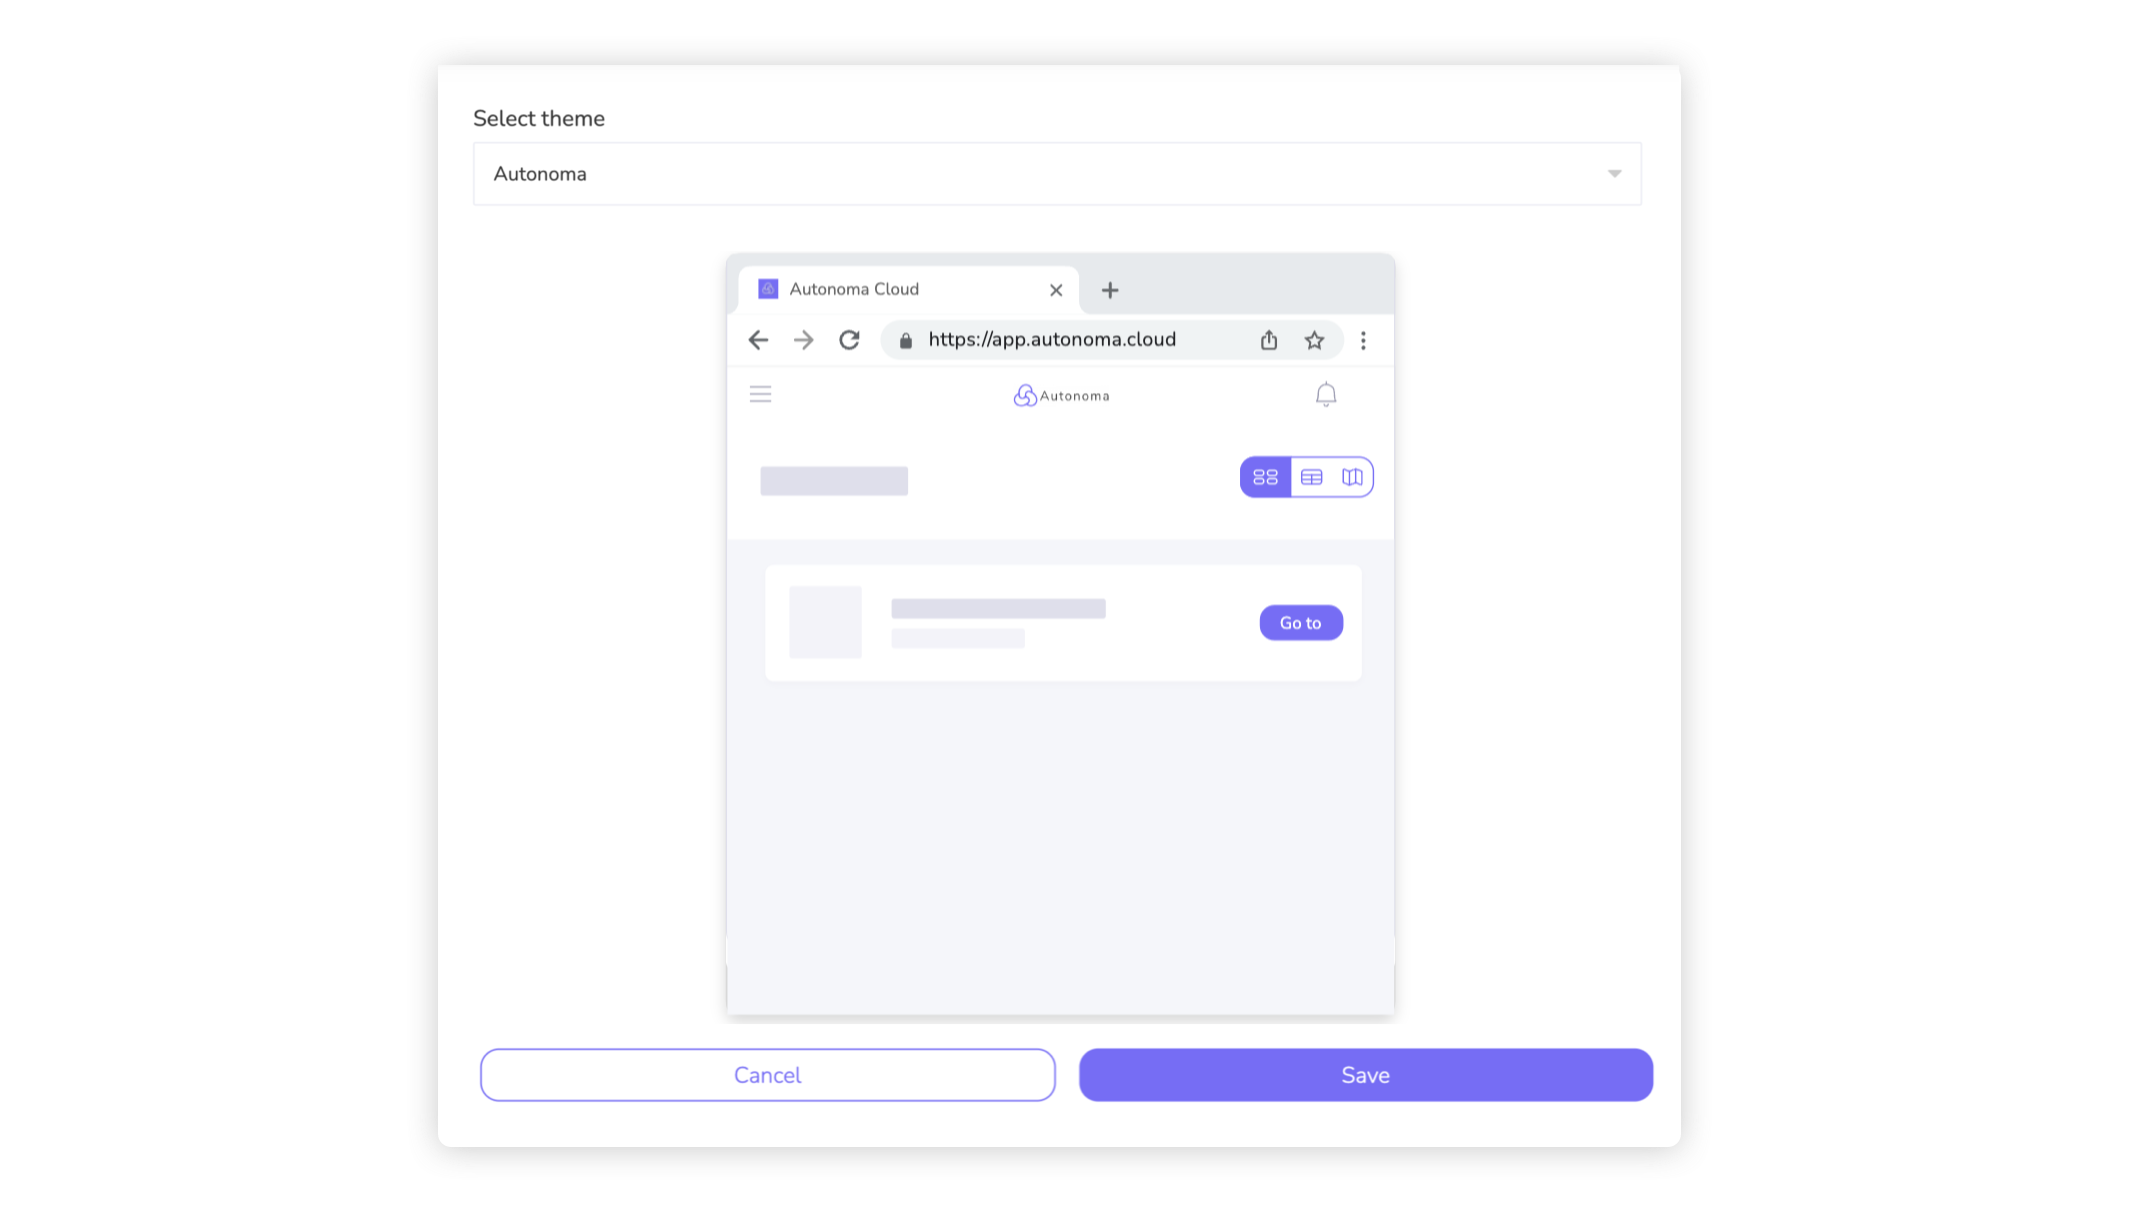
The design selected from the list is visualized below in the preview.
Select an Image
Create new design
This process guides you through the creation of a new design. The design is always created based on a website you have entered.For example, you can simply enter the link to the company website. Of course, you can still adjust and correct the automatically extracted visual features later. Now click on "Next".
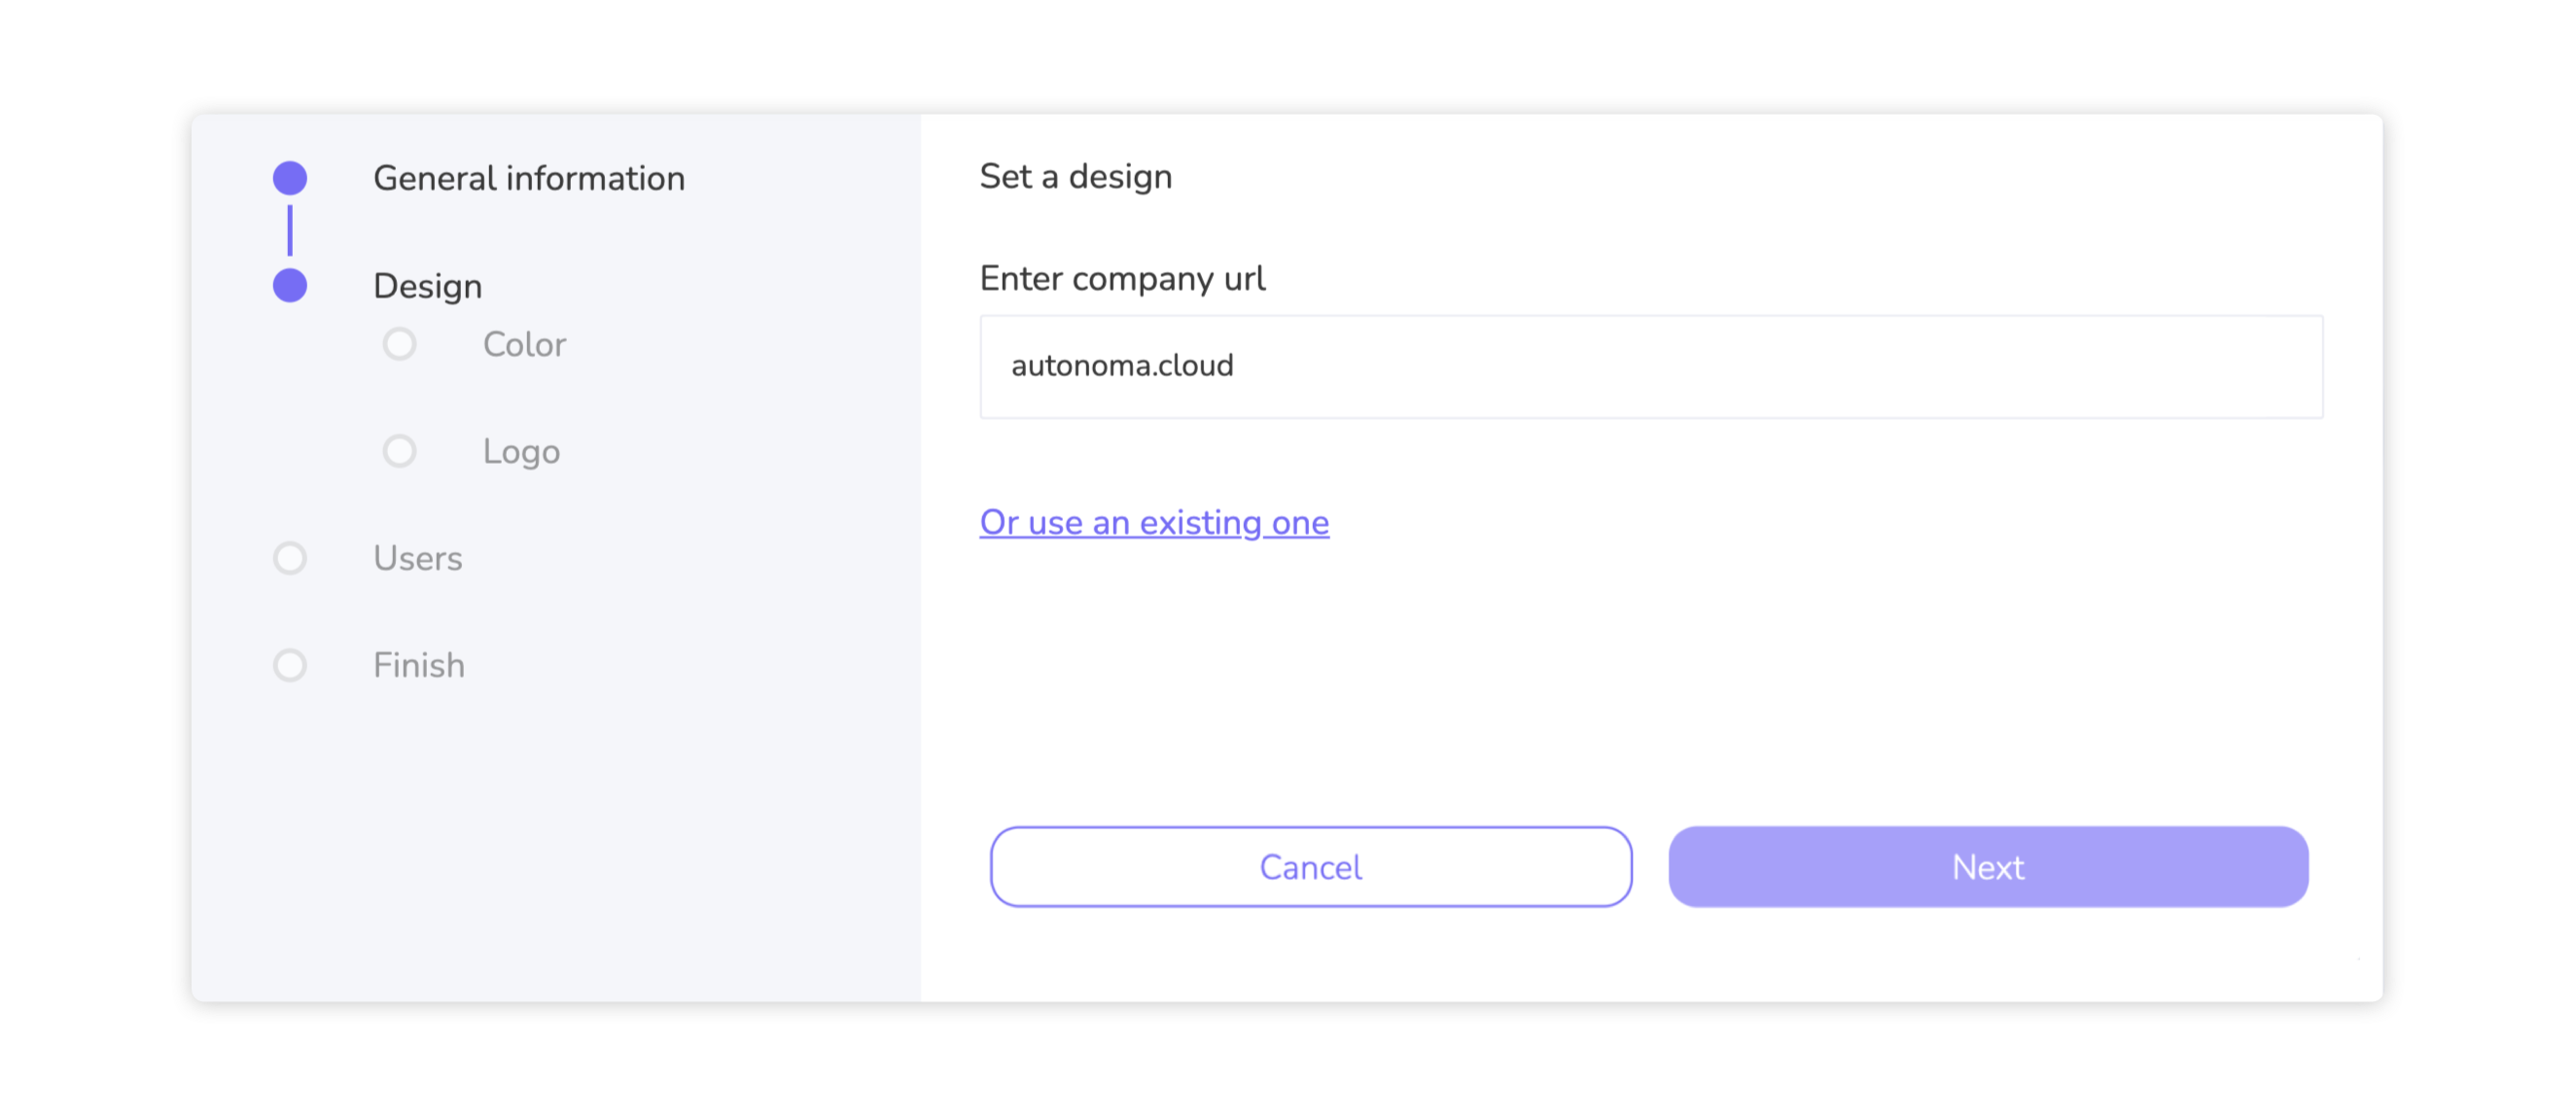
Input of a website (e.g. company homepage) to extract visual information.
Select an Image
After a short processing, the colors found on the website appear automatically. By clicking on the respective tile, you can select the color that best represents the account or the organization/unit behind it. Optionally, you can enter your own color value (HEX format) in the input field.Confirm the color selection by clicking on "Next".
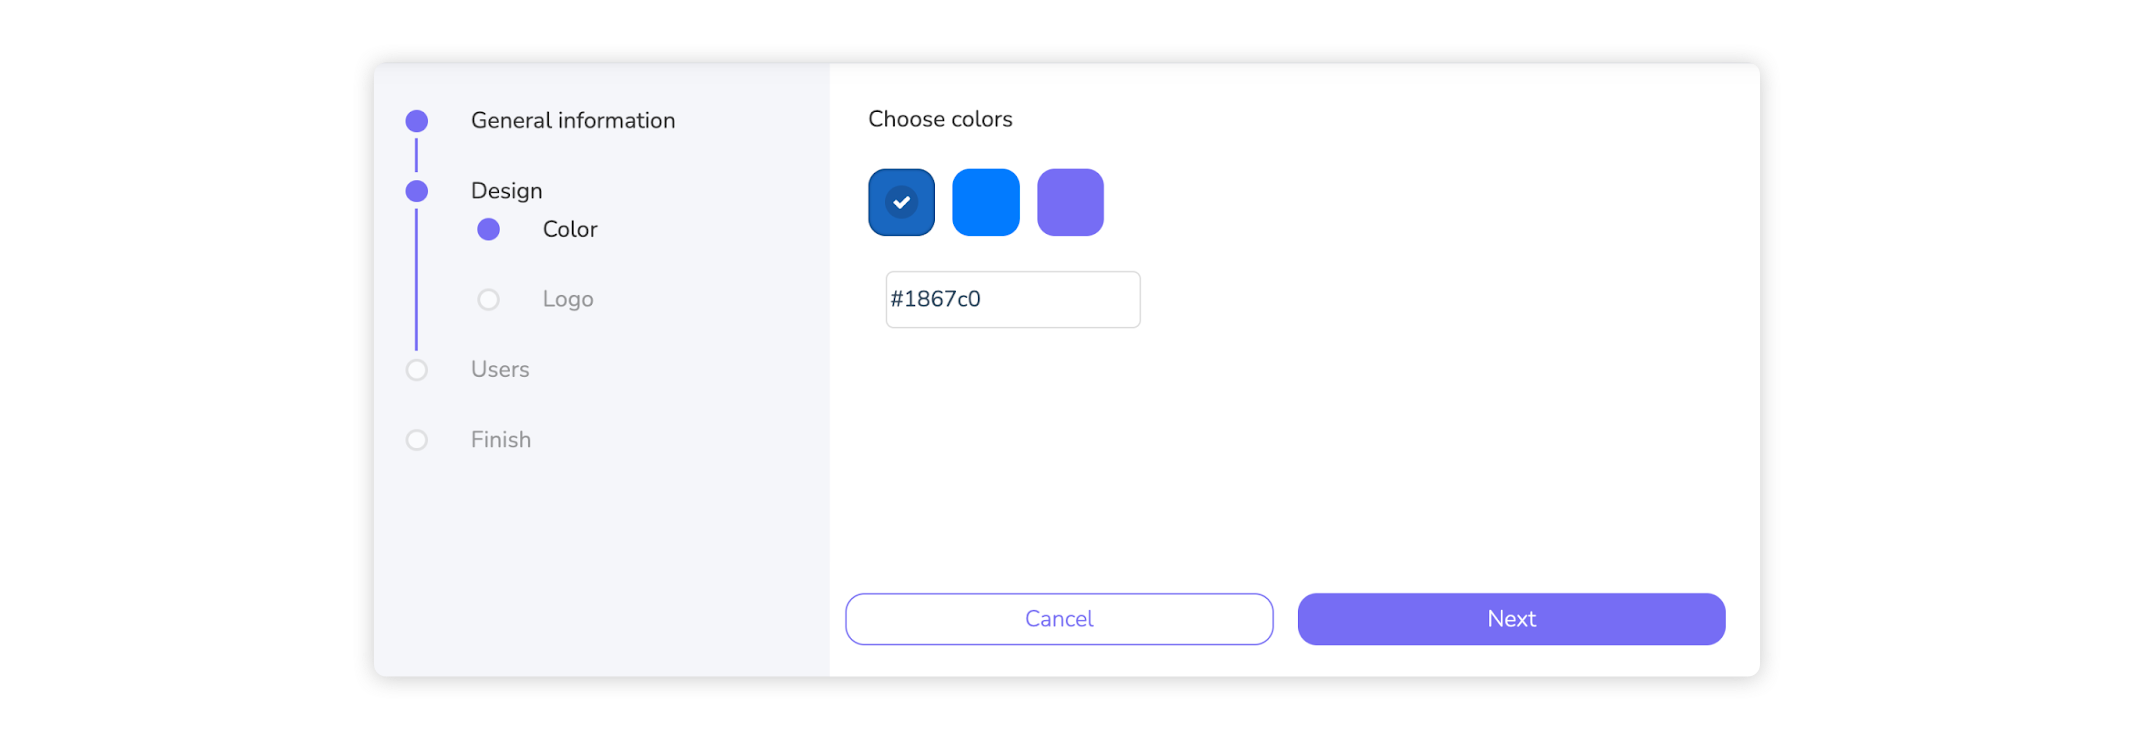
Suggested colors and input field for a specific color value (HEX format)
Select an Image
All images that could be used as a logo are listed in the next step. Click on the image that best represents the new account. Once you have made your selection, you can complete the creation by clicking on "Create design".
Info:
To make more settings to the design and edit it, visit our article LINK EDIT DESIGN
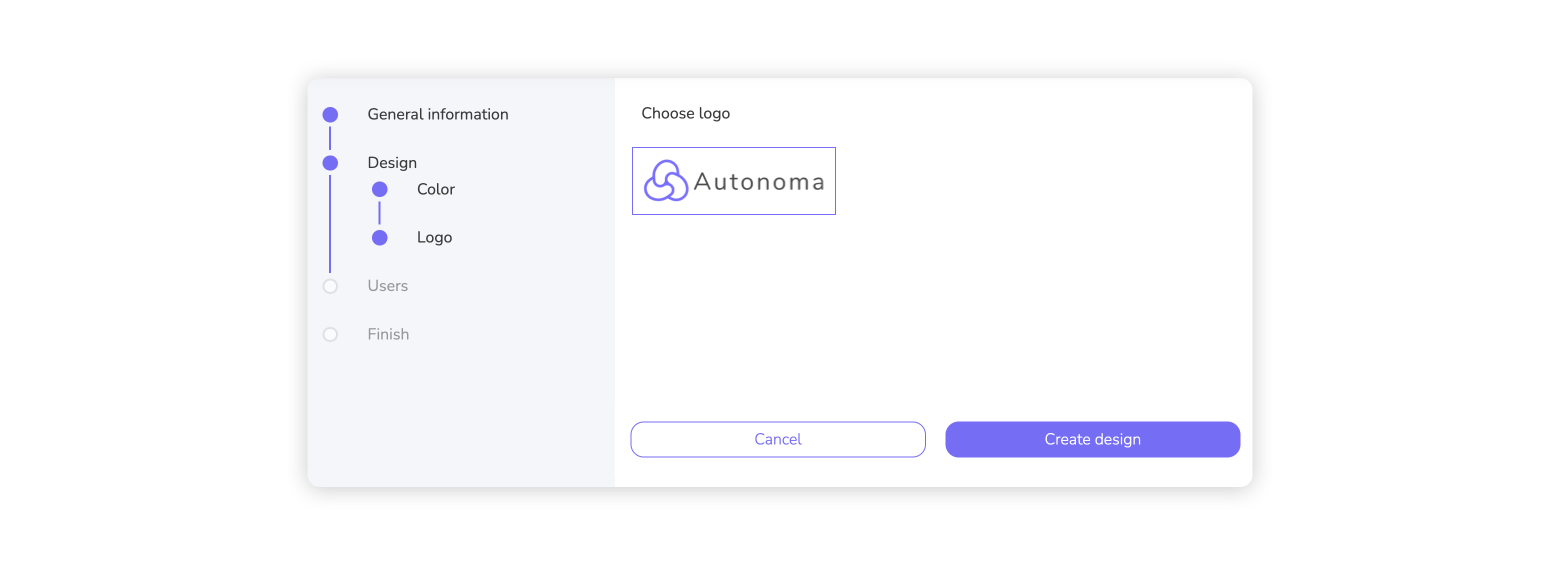
The logo found on the website.
Select an Image
The creation or selection of the design is now complete. In the last step of the account creation process, you can now invite members. This step is optional, as you can also add members at a later time in the account overview.
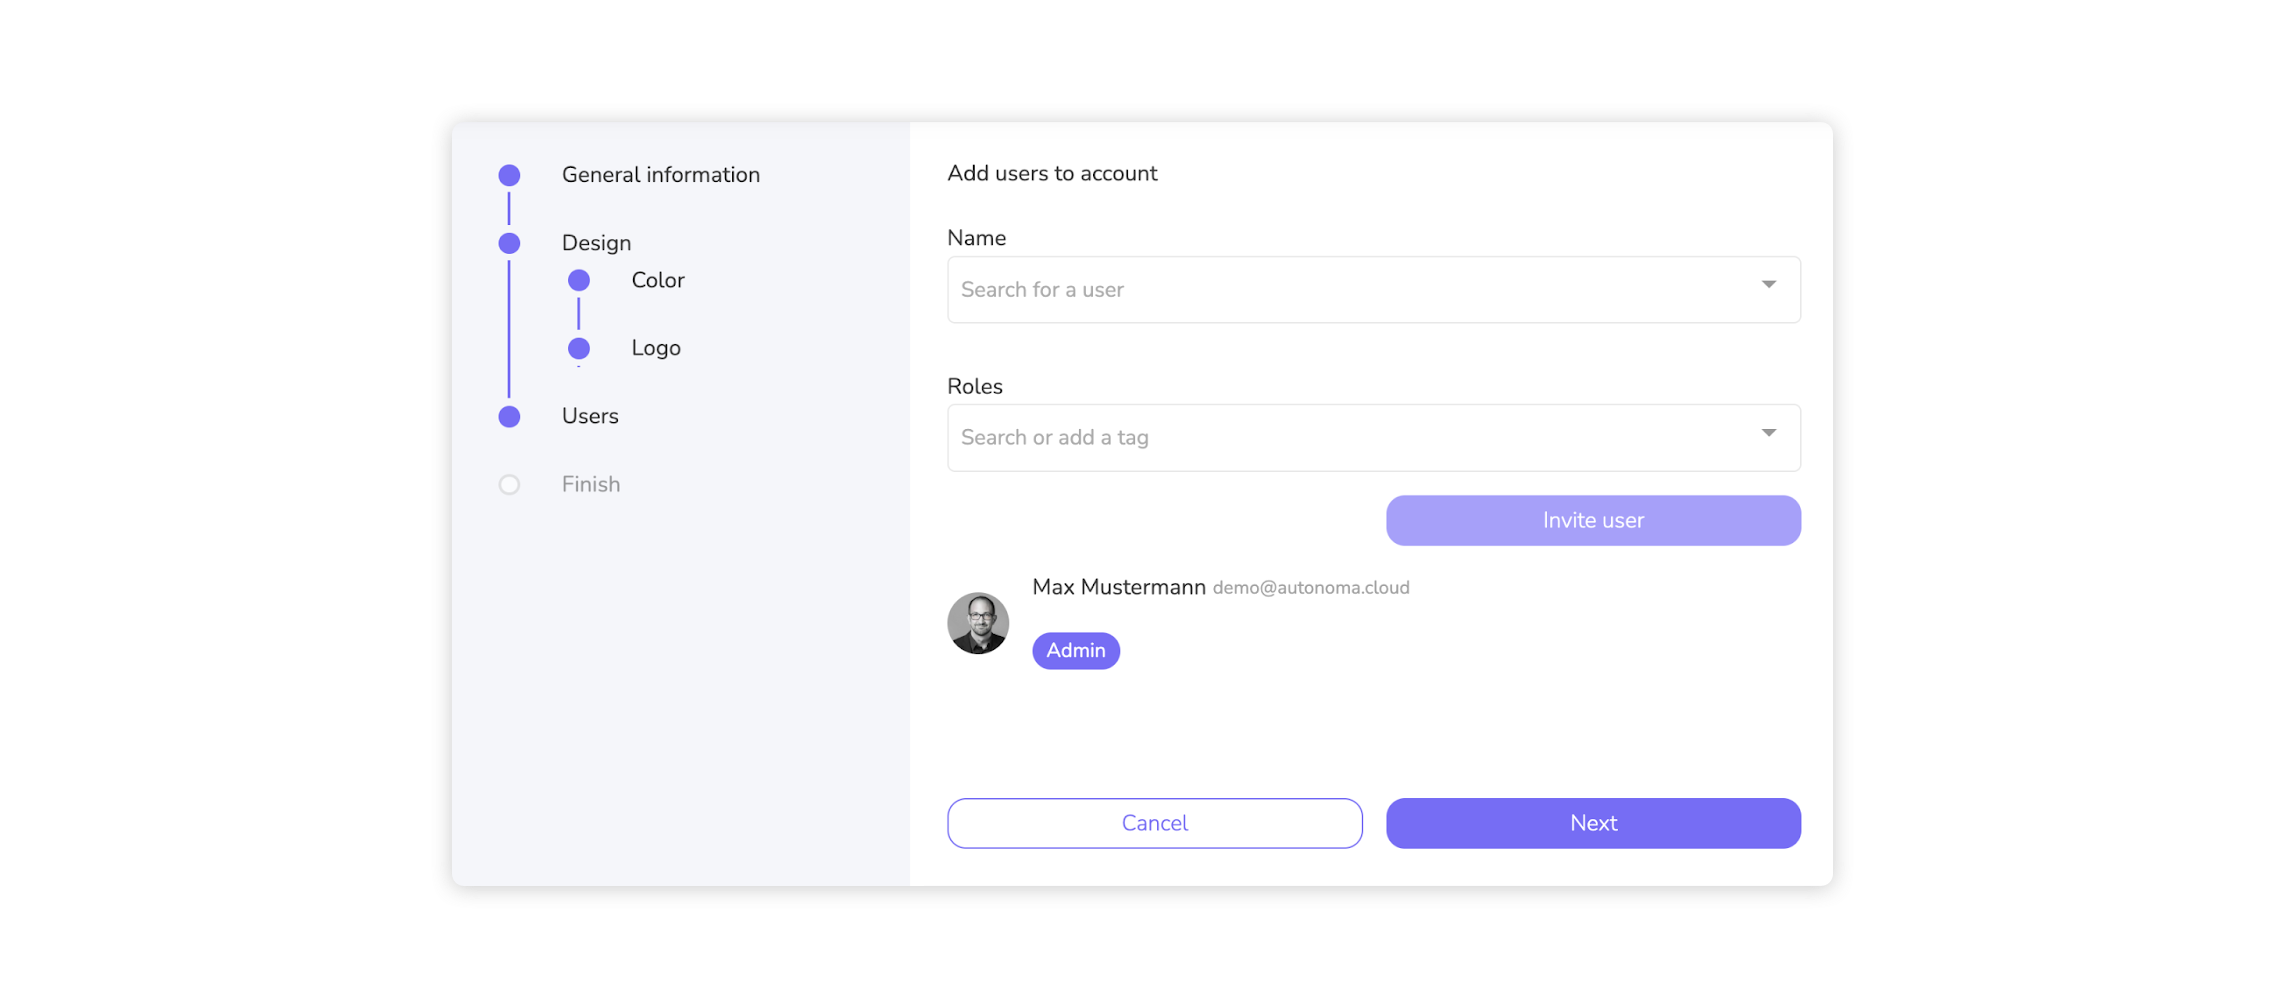
The screen for inviting account members. New users can be added in the upper area. The lower section contains a list of existing members.
Select an Image
To invite a member, click on the name input field ("Search for a user"). There are two different starting positions:
- The user to be invited is already a member of another account and therefore already exists on the platform
- The user to be invited does not yet have access data for an account and must first become a member.
The loading process differs slightly depending on the initial situation and is described for both situations in the following points:
Invite a user who is already registered on the platform
Click on the input field ("Search for a user") and enter either the name or e-mail address of the person to be invited.
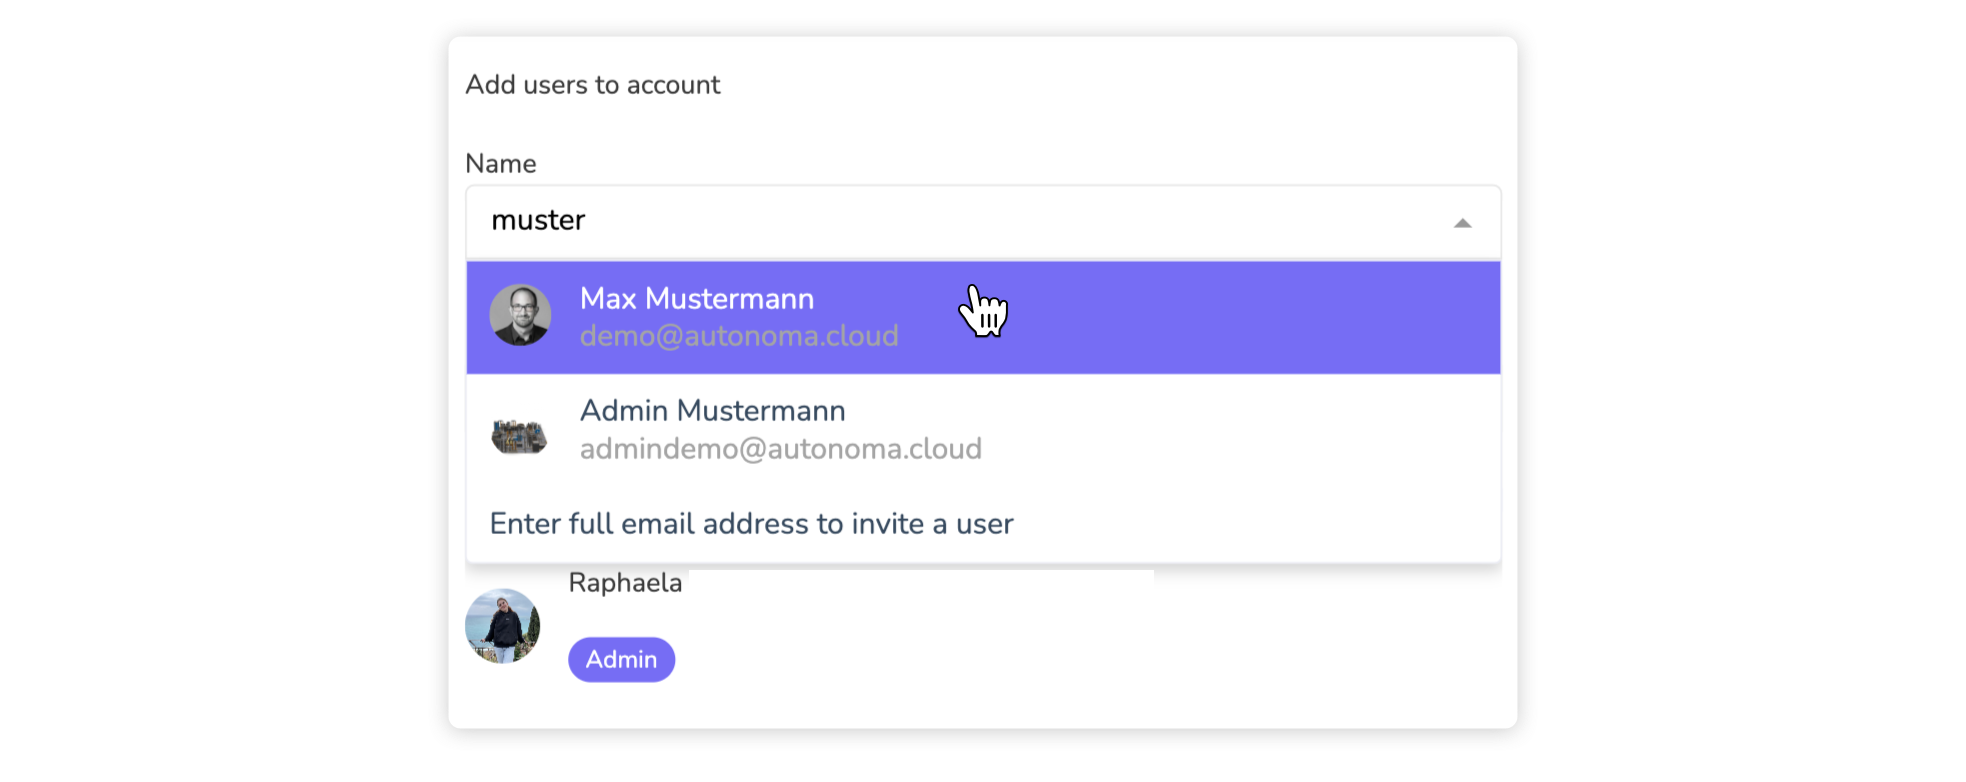
Two existing users in the search results, where the first is already a member of the newly created account (in this case the account creator)
Select an Image
The list below always shows all users found for your search criteria. People who are already members of the current account are grayed out and marked with a check mark to avoid duplicate invitations. Now select the desired user with a click.
Invite a new user without access data
A new user is a person who is neither a member of another account nor has access data to the platform. You can also simply invite such a person to your new account. To do this, enter the full e-mail address of the person you want to invite in the search field for users. As soon as a valid e-mail has been entered, an entry will appear in the list for inviting the new user. Click on this list entry.
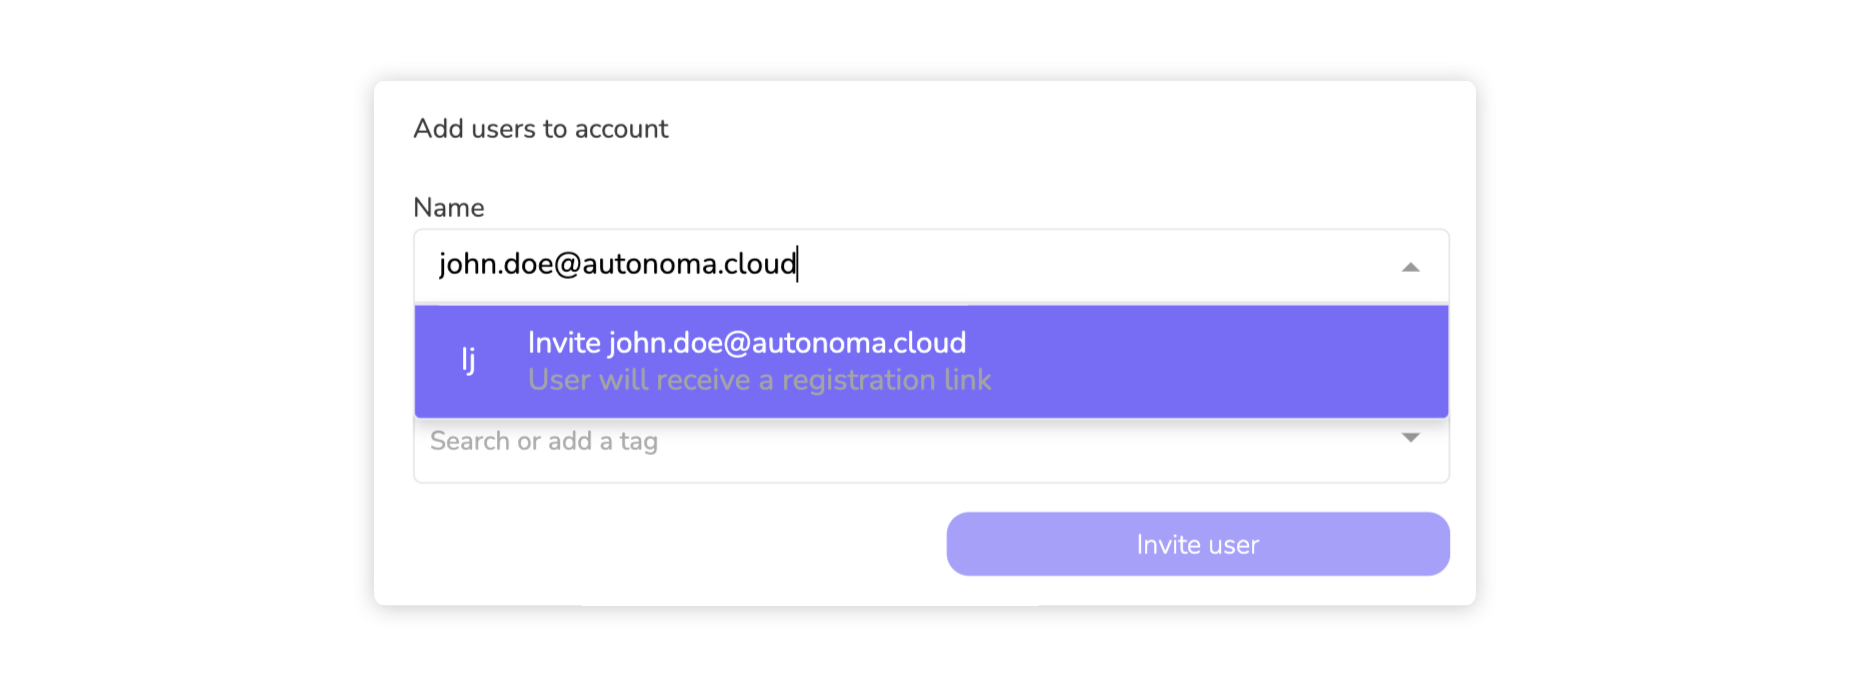
After entering a complete e-mail, a user who is not yet a member of the platform can be invited.
Select an Image
You must now enter the first and last name of the new user.
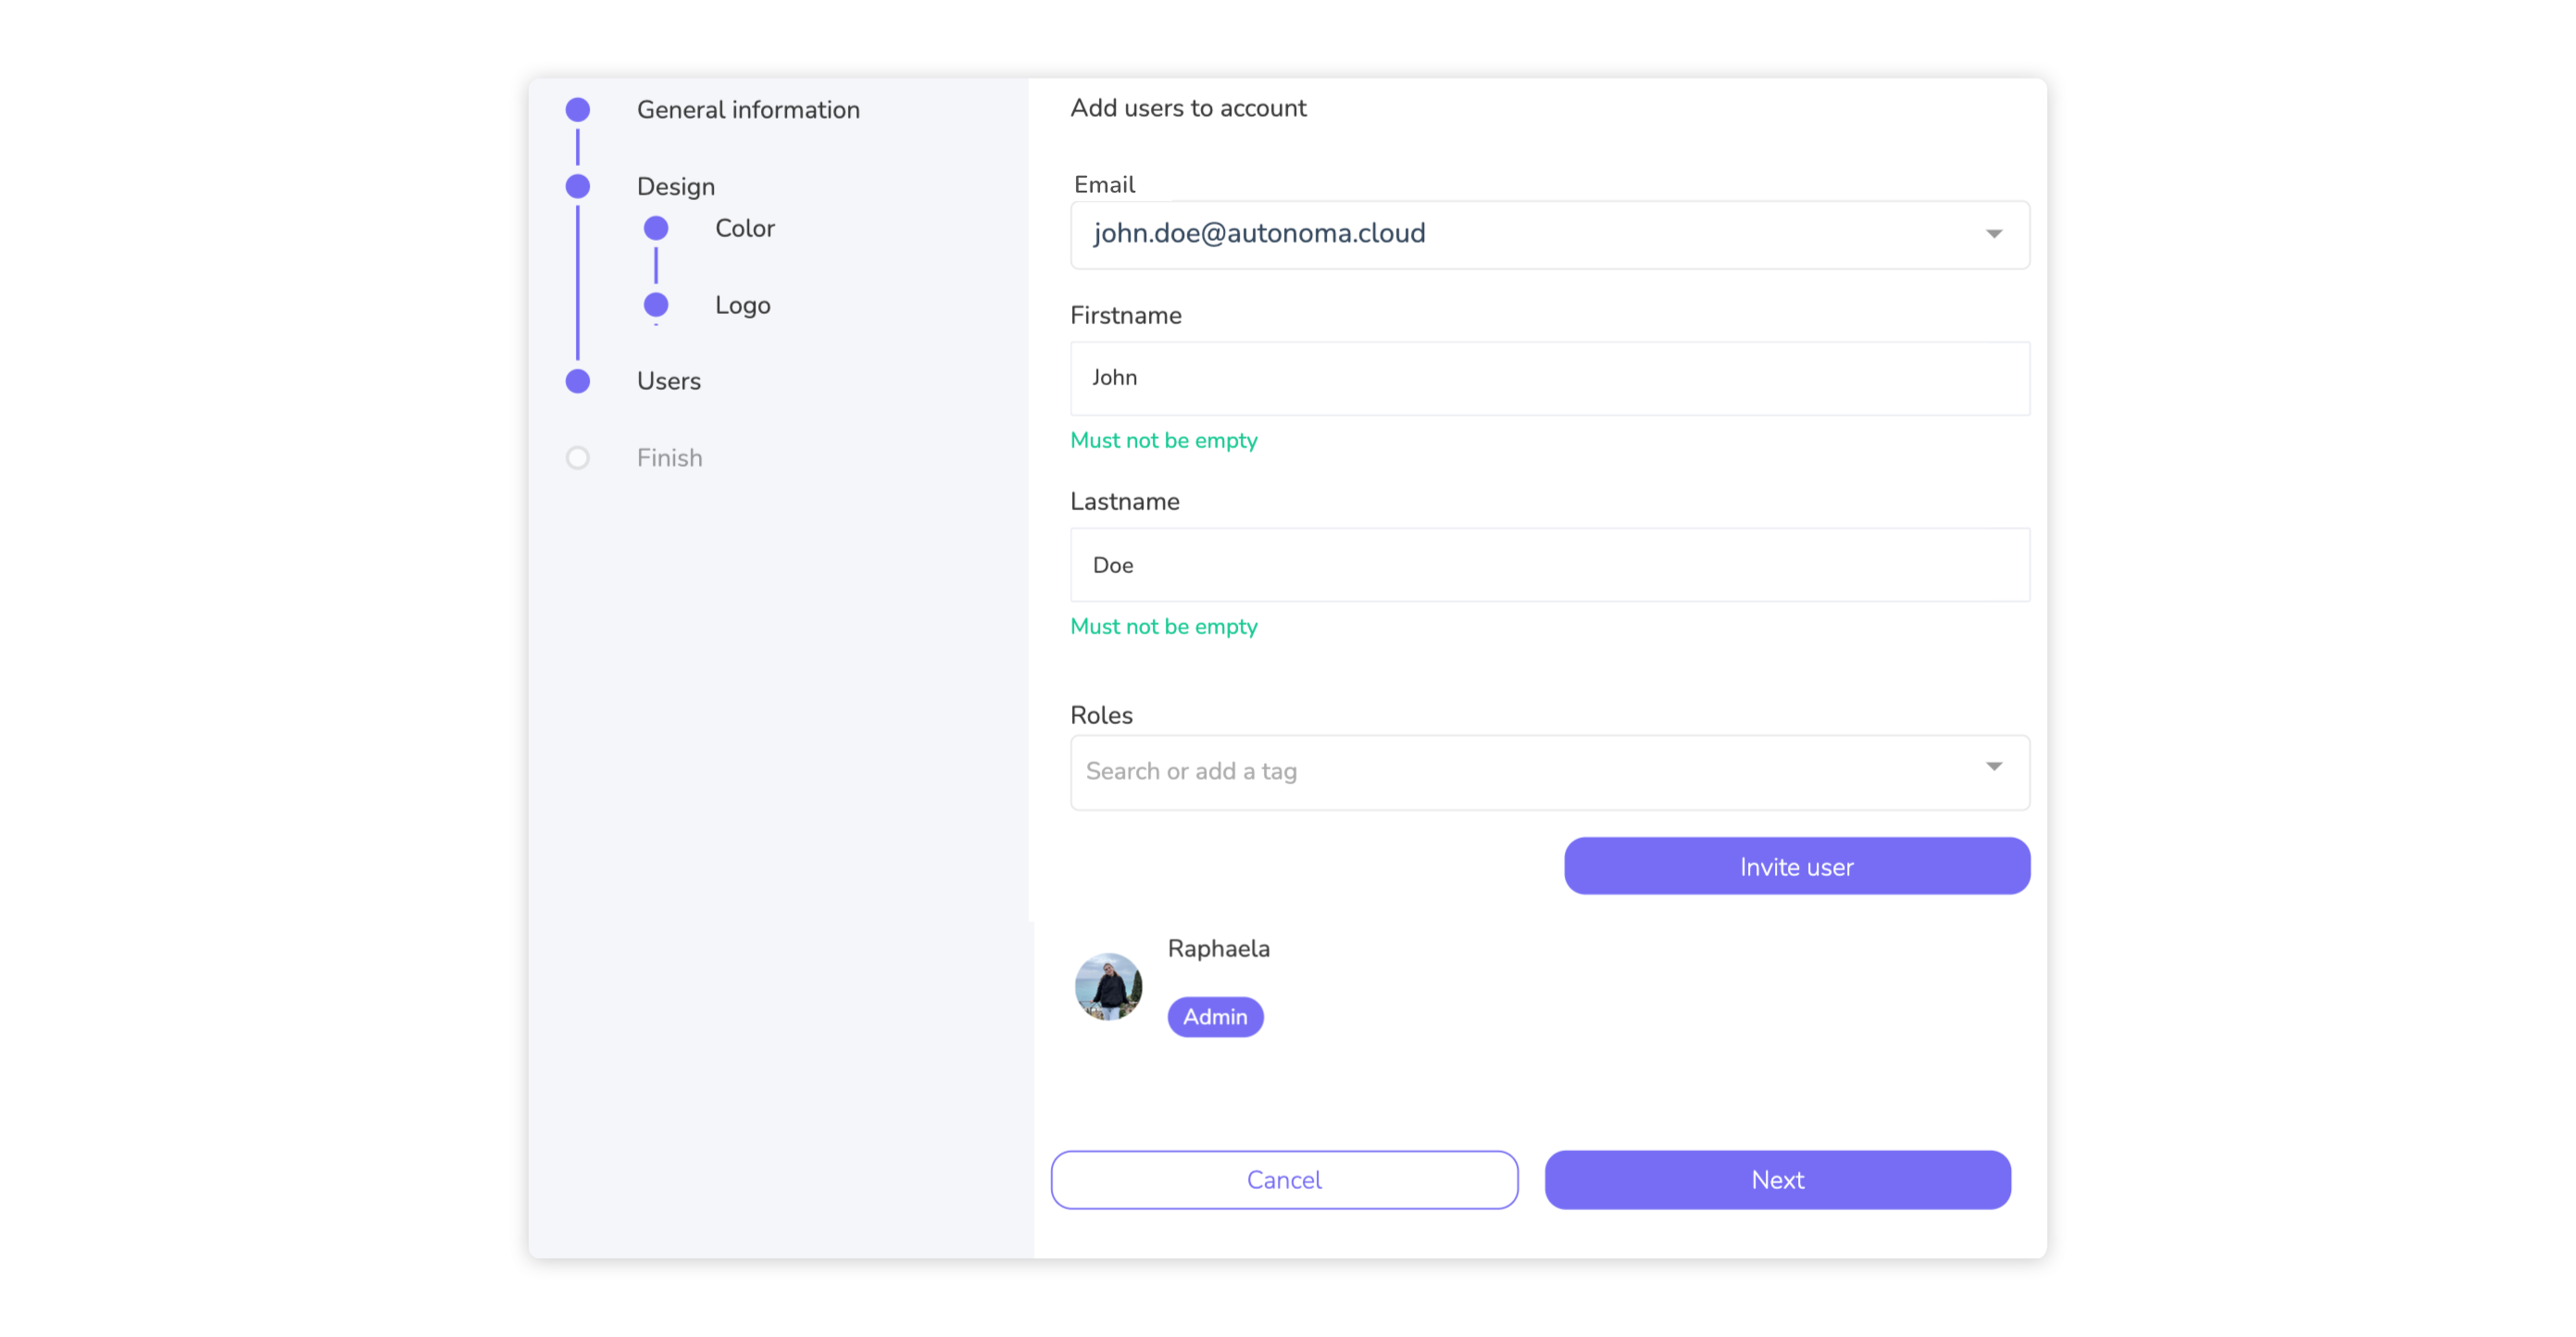
Enter the basic data of the new user.
Select an Image
You have now either selected an existing user or entered a new e-mail address. In both cases, the user requires an account-specific role. This defines which functions and operations may be carried out and which restrictions apply to the user.
Click on the input field for the roles ("Search or add a tag") and select the desired role. You can also select several roles by simply selecting them in order from the list.
As your account has just been created, only the standard role is available. If you want to create additional roles, read the article LINK CREATE ROLE.
If the new user is to receive a newly created role, first create this role and then assign the role to the corresponding user via the account details page (LINK INVITE USER ACCOUNT OVERVIEW or CHANGE ROLE).

Selecting a role
Select an Image
Once you have selected the role(s), complete the process by clicking "Invite user". If the invited person is a new user, the corresponding access data for the platform and information about the new account will be sent by email. The recipient can then log in directly to the platform. If the user already exists, they will be notified and informed about the new account, depending on their personal notification settings (LINK NOTIFICATION SETTINGS).
Repeat the previous steps to add as many people as you want to the account.

The Admin role has been selected for the new user.
Select an Image
As soon as you have finished adding users, you can continue the process by clicking on "Next".
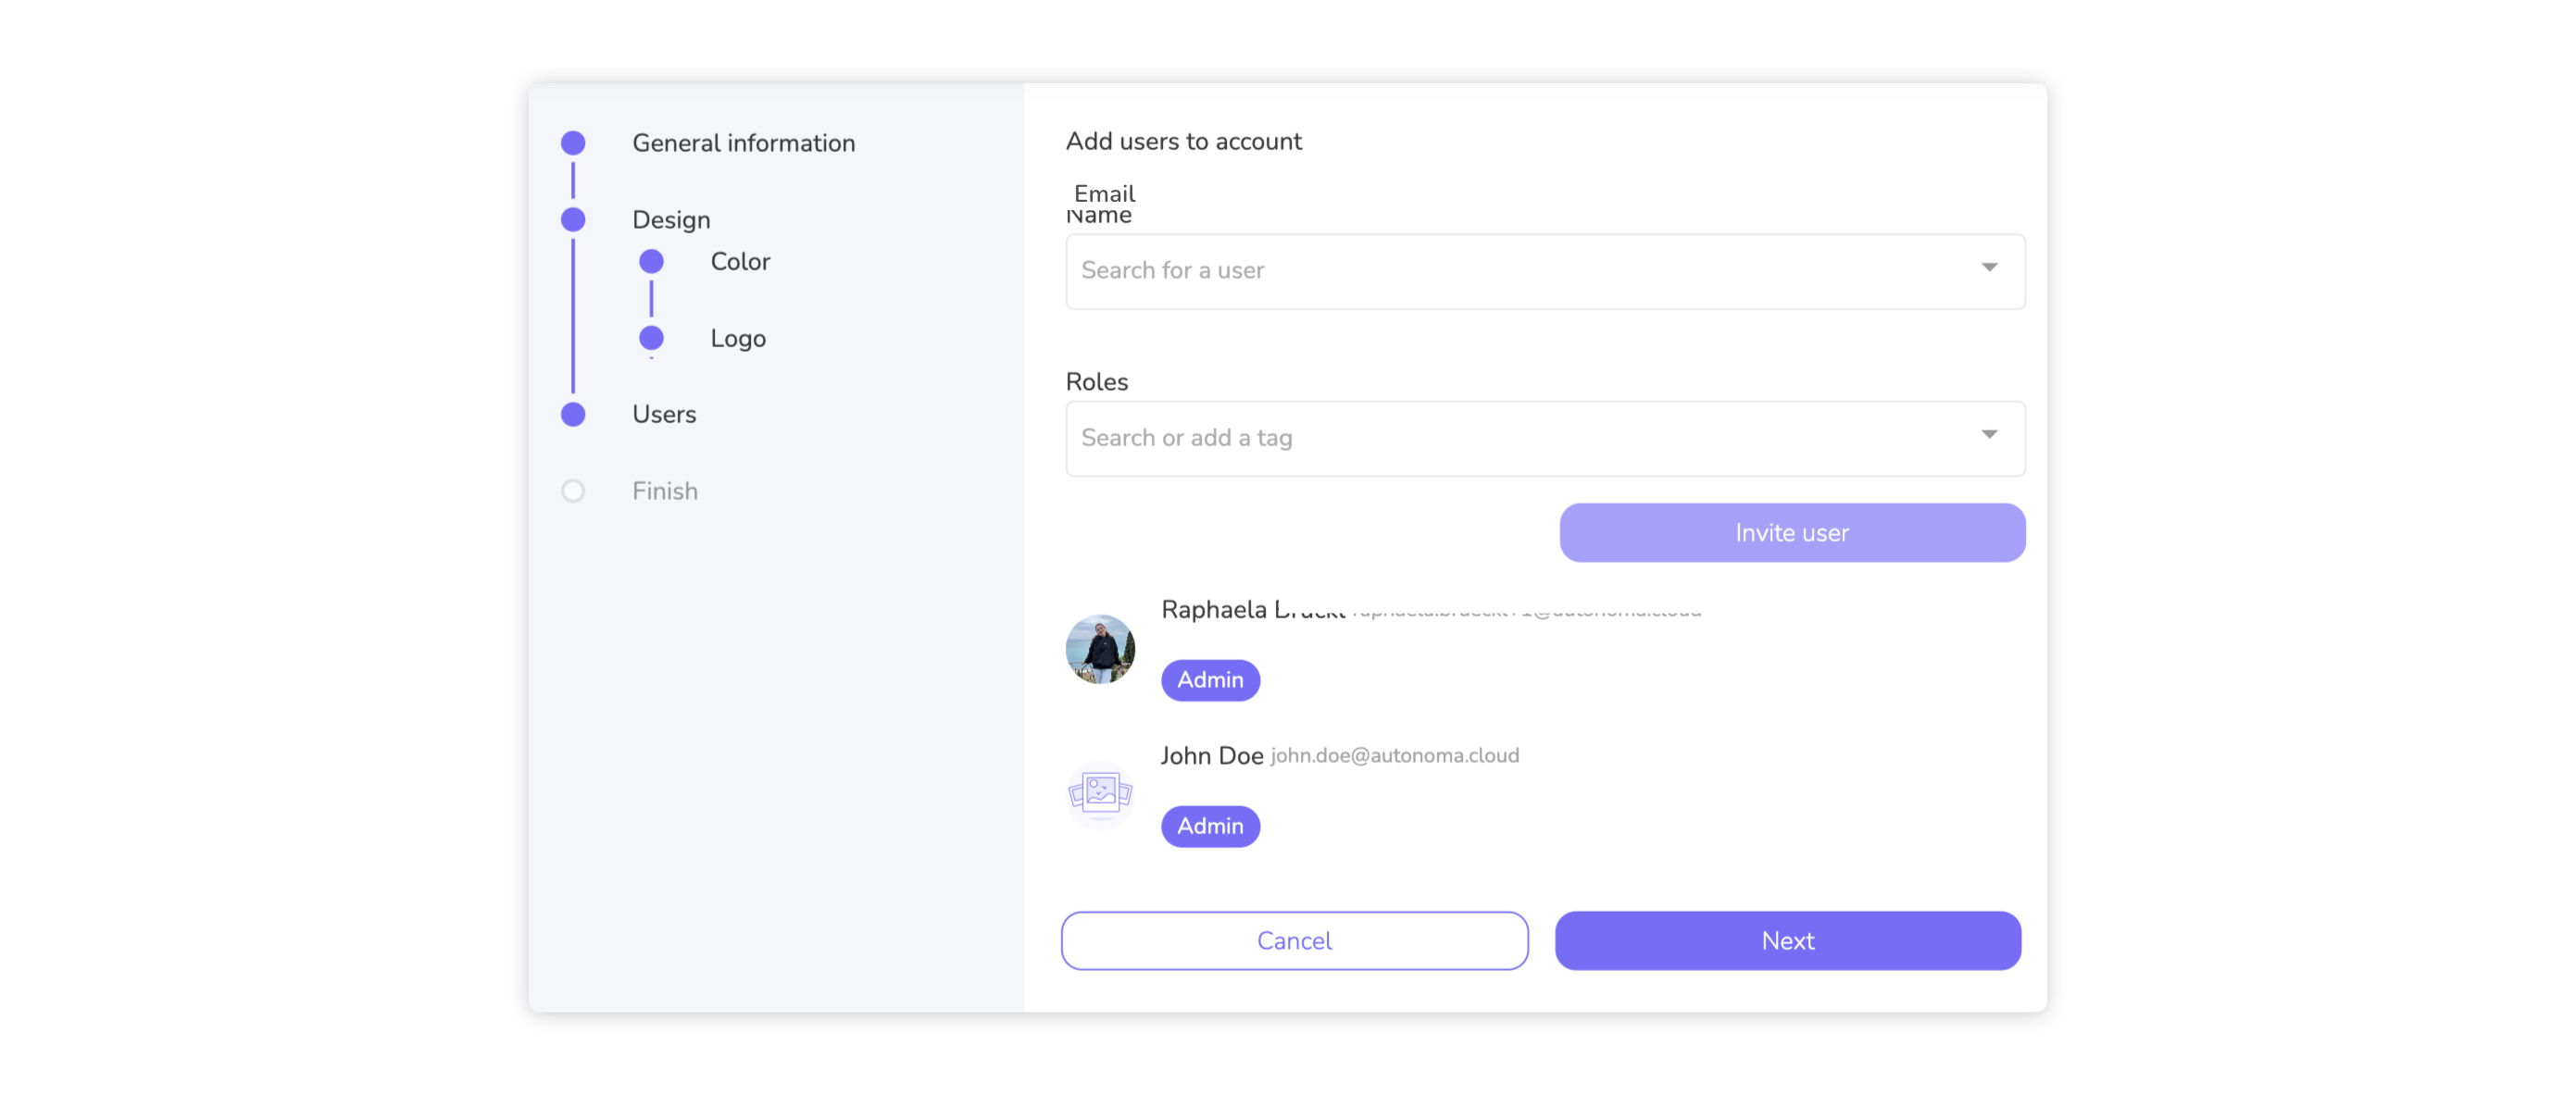
The newly invited user can now be found in the list of account members.
Select an Image
A success message confirms the creation of the new account. All the necessary steps have now been completed and you can switch to the detailed view of the new account by clicking on "Go to new account". Please note: You will then be redirected to the details page of the account and your user's active account will be updated automatically.

The account was successfully created.
Select an Image
Haven't found the answer? We can help.
Submit a requestContact us and we’ll get back to you as soon as possible.
